
--:: Creating a VPN with DragonVPN:FoeHammer ::--
Its easy to create a your own VPN with DragonVPN:Foehammer. All you need is a Amazon Web Services account and you can be in total control of your VPN.
Amazon Web Services
Amazon Web Sevices (AWS) offer a range of on-demand computing resources that make it a good choice for running a personal VPN. There are other Cloud providers and DragonVPN:FoeHammer will have ports for Azure and Google Cloud in the near future.
So the first thing to do is to sign up for an AWS account here: Sign up for an AWS account
A note about signup and costs. AWS operate on a Pay-As-You-Go model so you are only charged for the resources you consume in AWS. Simply put this means that if you don’t use anything then you are not charged but if you start using services then you will incur costs and how much these are depend on what you use.
For example it's possible to run DragonVPN:Foehammer on a t2.mico with 2Gb data transfer for approximately $9 per month. This cost could be reduced by terminating the EC2 instance when not in use and making use of spot instances. For a detailed cost breakdown of AWS resources visit https://calculator.s3.amazonaws.com/index.html.
Creating A DVPN:FoeHammer VPN Server
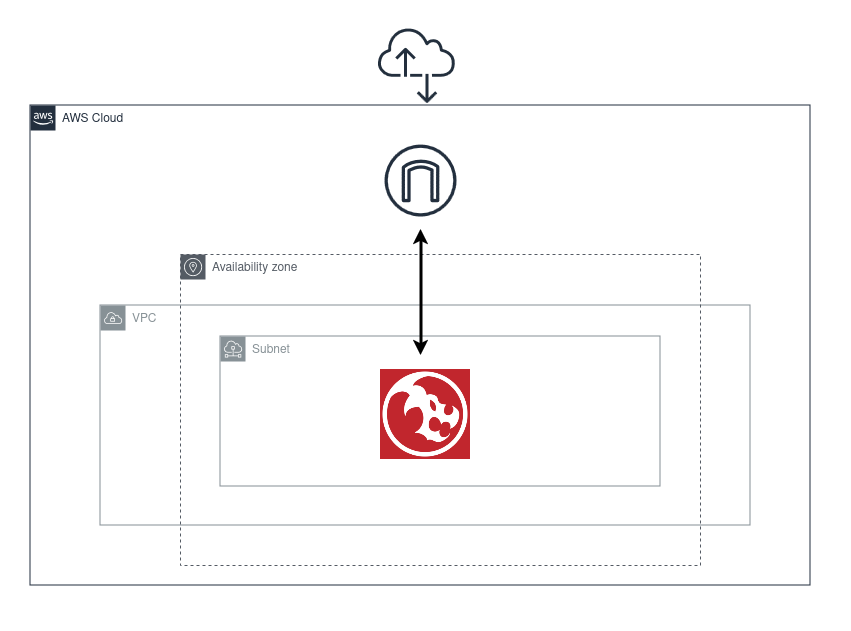
When you have an AWS account you will need to create infrastructure needed to support DVPN:FoeHammer. A simple setup for this could be a VPC, single subnet, routing table and an internet gateway as shown in the diagram below.
Once you have AWS infrastructure setup, select EC2 and click on Launch Instance.
Then search for 'DVPN:FoeHammer' and click subscribe. You are now able to launch a new EC2 instance using the DVPN:FoeHammer image.
On the next screen you have options to select for launching the server. Here you can change the instance type used by the image - for personal use a t2.small is probably enough. If you are following the example setup above make sure that auto-assign Public IP is set to Enable or the EC2 instance will not be reachable.
Click next and go the 'Add storage' screen. It's advisable to have a minimum of 8GB for this instance. You are free to allocate less but you may increase the chance of instability with your VPN.
Click next and go to the 'Add Tags' screen. It’s a good idea to add a tag for the instance so you can identify it later. Click 'Add Tag' and in the Key field, put Name and in the Value field put FoeHammer. Now when the instance is launched you will be able to see which of your EC2 instances is hosting the VPN.
The final step is to configure the security group and this allows you to restrict which IP addresses can connect to your VPN. It's advisable to limit this to your current location and you can do this by adding a custom UDP rule, setting the Port Range to 1194 and in the Source drop down select 'My IP'.
Note that unless you have a static IP address it will change from time to time and if you suddenly find that you no longer have access you probably just need to change this setting.
That’s it. After the VPN server has started you will be able to get your connection config file after a couple of minutes by running a command similar to this:
scp -i
Congrats! Now that you have the client.ovpn file from DVPN:FoeHammer you can start your openvpn client and enjoy your new VPN server.
Getting More From Your VPN
If you are frequently creating and destroying VPN instances you can alternatively run this from CloudFormation or Terraform to automate the process. The benefit of this approach is that you could trigger the creation of the VPN sever from an Instant Message or a webhook. A similar process could then be triggered to shut the VPN down and also save you money.
If you would like to explore the option of using CloudFormation for this then we have a helpful project in GitHub that you can use to get started.